

Cold Brew Concentrate for Camping: A Step-by-Step Guide
Table of Contents
- What You'll Need: Equipment and Coffee for the Trail
- Cold Brew Concentrate Ratio: Getting the Foundation Right
- Steeping Time and Coarse Grind: Building Extraction Without Bitterness
- Straining and Filtration: Removing Sediment for Clean Concentrate
- How to Store Coffee Concentrate While Camping
- How to Dilute Cold Brew Concentrate for Serving
- Common Mistakes to Avoid When Making Cold Brew for Camping
- Frequently Asked Questions
Last Updated: September 25, 2026
What You'll Need: Equipment and Coffee for the Trail
Making cold brew concentrate camping requires just a few essentials. Your equipment choices depend on trip type: car camping allows heavier, durable gear, while backpacking demands weight optimization.

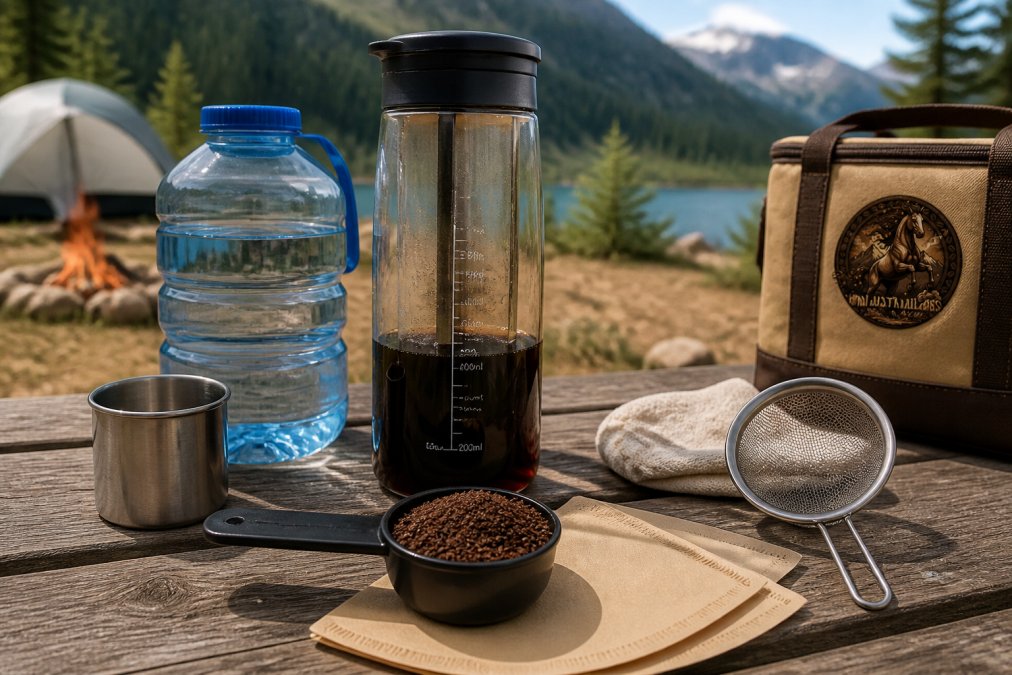
Core Brewing Vessel (Trip-Dependent)
For car camping: A mason jar, French press, or airtight container works well. A quart-sized mason jar (32 oz) weighs 14 oz and produces enough concentrate for 4-6 cups of finished coffee.
For backpacking: Use a lightweight plastic bottle (6-8 oz) or collapsible silicone container (3-4 oz). The weight difference matters: a glass jar adds 14 oz versus 3 oz for a collapsible container, an 11 oz difference that compounds over multi-day trips.
Caffeine-Per-Ounce Efficiency
Cold brew concentrate is efficient for backpacking. One pound of coarse ground coffee mixed with 4 pounds of water produces 80 oz of concentrate yielding 16-20 cups of finished coffee (at 1:1 dilution), roughly 5 oz of weight per 10 cups.
Instant coffee weighs 0.1 oz per cup but tastes thinner. Cold brew concentrate weighs 0.5 oz per cup with richer flavor. Pre-made bottled cold brew weighs 8-10 oz per cup. Choose instant for weight, cold brew concentrate for taste.
Straining and Filtration Equipment
You'll need a way to strain. For car camping, bring a fine mesh filter, cheesecloth, and coffee filters. For backpacking, choose one:
- Mesh strainer (2-3 oz): Reusable, durable, works for both coarse and fine filtration. Best for multi-day trips where you'll use it repeatedly.
- Cheesecloth (0.5 oz): Lightweight, packable, but tears easily and requires careful handling. Single-use or limited reuse.
- Paper coffee filters (0.1 oz): Lightest option, single-use, but effective for fine filtration. Bring 10-15 filters for a week-long trip.
Storage and Transport Containers
For car camping: Pack an airtight container that fits in your cooler or vehicle without taking up too much space. A quart-sized mason jar works perfectly.
For backpacking: Use a leakproof, lightweight container. A rigid plastic bottle with a secure screw-top lid (6-8 oz) is ideal. Test the seal before you leave home by filling it with water, sealing it, and inverting it over a sink. A spill inside your backpack ruins gear and wastes coffee. For ultra-light backpacking, a collapsible silicone pouch (3-4 oz) saves weight but requires more careful packing.
Additional Essentials
Bring a mesh strainer or coffee filter (2-3 oz), cheesecloth (0.5 oz), and an airtight container (6-14 oz). Pre-measure coffee and water at home to avoid carrying a scale.
Optional Gear
A stainless steel insulated tumbler (8-12 oz) keeps coffee at stable temperature. For car camping, this is nice-to-have. For backpacking, the weight trade-off usually isn't worth it.
Cold Brew Concentrate Ratio: Getting the Foundation Right
The coffee-to-water ratio determines how strong your cold brew concentrate becomes. Get this right, and you'll have a shelf-stable concentrate that lasts for weeks.
Use a 1:4 ratio of coarse ground coffee to cold water by weight (1 pound coffee to 4 pounds water, or 1 cup to 4 cups). This produces a concentrate strong enough to dilute without losing flavor.
A standard cold brew uses 1:5 or 1:6 ratio for drinking strength. The 1:4 ratio creates a concentrate that holds up when diluted at camp, ensuring your final cup stays bold.
Measure by weight for precision. Cup measurements work but are less precise. Some prefer a 1:3 ratio for a syrup-like base; test both to find your preference.
Steeping Time and Coarse Grind: Building Extraction Without Bitterness
Cold brew concentrate steeps for 12 to 24 hours at room temperature. Start with 12 hours, then taste. Most find 18-24 hours produces ideal balance. Avoid steeping longer than 24 hours to prevent harsh, woody flavors.
Coarse grind is critical. Fine grounds over-extract during long steeps, creating bitterness. Coarse grounds slow extraction, letting flavor develop without bitterness.
Room temperature (65-75°F) is ideal for steeping. Cold water (below 40°F) requires 24-48 hours. Warm weather at camp shortens steep time to 12 hours.
Stir once or twice during steeping to keep grounds suspended and encourage even extraction.
Straining and Filtration: Removing Sediment for Clean Concentrate
Use two-stage filtration: First, pour through a coarse mesh strainer to remove bulk grounds. Second, run through a fine filter (cheesecloth, paper filters, or fine mesh) to remove fine sediment. Your final concentrate should be clear and smooth.
Pour slowly during filtration. Rushing creates pressure that forces sediment through filters. Patient pouring produces clearer concentrate.
If you're using a French press, press the plunger down slowly. Pushing hard forces fine particles through the mesh. Gentle pressure gives you the cleanest concentrate.

How to Store Coffee Concentrate While Camping
Cold brew concentrate is shelf-stable at room temperature for up to two weeks. Temperature fluctuations during transport and in the field degrade quality fastest.
Temperature Stability During Transport
Heat cycling, repeated warming and cooling, accelerates oxidation and flattens flavor. Insulate during car transport by wrapping your container in a reflective blanket or placing it in an insulated lunch bag on the vehicle floor. Bury your container in your backpack's center, surrounded by other gear, to create a thermal buffer. Brew the night before you leave to allow full cooling before transport.
Storage at Camp
Keep the container in a cool spot at camp. Direct sunlight degrades flavor over time. A shaded area, inside your tent, or buried slightly in cool soil works well. If temperatures climb above 80°F, consider packing your concentrate in an insulated cooler or wrapping it in a damp cloth to cool through evaporation. A damp cloth wrapped around your container can drop the internal temperature by 10-15°F through evaporative cooling, especially effective in low-humidity environments.
Container Selection for Camping
Store your concentrate in an airtight container designed for outdoor use. Glass jars with tight lids work perfectly for car camping, but they're heavy and breakable on the trail. For backpacking, use a lightweight plastic bottle with a secure screw-top lid (like a Nalgene or similar rigid plastic bottle). Test your container's seal before you leave home by filling it with water, sealing it, and inverting it over a sink. A leaking container ruins gear and wastes coffee.
Label your container with the date you made the concentrate. This helps you track freshness and ensures you use older batches first. A piece of waterproof tape and a permanent marker takes 10 seconds and prevents confusion at camp.
Extended Trip Storage
For trips longer than two weeks, refrigeration extends shelf life to four weeks. If your campsite has a cooler with ice, keep your concentrate there. The cold slows oxidation and preserves flavor. If ice isn't available, your concentrate remains drinkable for 10-14 days at room temperature, though flavor quality declines noticeably after day 7.
How to Dilute Cold Brew Concentrate for Serving
Diluting your concentrate to drinking strength is simple. Use a 1:1 ratio of concentrate to water as your starting point.
Mix equal parts concentrate and cold water for a standard cup. If you want it stronger, use 2 parts concentrate to 1 part water. For a lighter cup, use 1 part concentrate to 2 parts water. Start at 1:1 and adjust to your taste.
You can also dilute with hot water.
If you want iced coffee at camp, use cold water for dilution. Pour over ice if you have it, or drink it cold straight from your container. The concentrate stays flavorful even when fully cold.
Common Mistakes to Avoid When Making Cold Brew for Camping
The most common mistake is using the wrong grind size. Medium or fine grounds create sediment, bitterness, and clogged filters. Coarse grounds are non-negotiable for this method.
Frequently Asked Questions
What is the ideal coffee-to-water ratio for cold brew concentrate?
A strong cold brew concentrate uses a 1:3 or 1:4 ratio of coarse ground coffee to water by weight. For example, use 1 pound of coffee to 3-4 pounds of water. This creates a concentrate you'll dilute later with water or milk. Start with 1:3 for maximum strength and adjust to 1:4 if you prefer a lighter concentrate. The coarse grind prevents over-extraction and bitterness during the long steeping period.
How long does homemade cold brew concentrate stay fresh when camping?
Homemade cold brew concentrate stays fresh when stored in an airtight container in cool conditions. On camping trips, keep it in an insulated container or bury it in cool ground near your campsite. Proper storage in an airtight container helps preserve flavor.
Can I make cold brew concentrate while camping, or should I prepare it at home first?
Preparing cold brew concentrate at home before your trip is more practical. It requires 12-24 hours of steeping, which ties up your camping space and equipment. Pre-made concentrate saves weight, reduces waste, and fits easily in a compact container. If you prefer fresh brewing on the trail, bring coarse ground coffee and a lightweight brewing vessel, then dilute with hot water for a faster pour-over method instead.
What filtration method works best for removing sediment from cold brew concentrate?
A mesh filter or cheesecloth removes sediment effectively without requiring special equipment. For camping, cheesecloth is lightweight and packable. Pour slowly through a fine mesh strainer lined with cheesecloth into your storage container. This two-step process removes fine grounds that create gritty texture. Pre-filtering at home before packing eliminates this step entirely on the trail.